Want to calculate Azure costs accurately and avoid surprise bills? You’re not alone. With Microsoft Azure’s vast array of services, tracking and predicting expenses can feel overwhelming. But with the right tools and strategies, you can gain full control over your cloud budget—starting today.


Why You Need to Calculate Azure Costs Accurately

Understanding your cloud expenditure isn’t just about saving money—it’s about making smarter business decisions. Whether you’re a startup scaling rapidly or an enterprise optimizing legacy systems, knowing how to calculate Azure costs is essential for financial planning, resource allocation, and long-term scalability.
Preventing Budget Overruns
One of the biggest risks of cloud computing is unexpected spending. Without proper monitoring, a single misconfigured virtual machine or unmonitored data transfer can spike your monthly bill. By learning how to calculate Azure costs early, you can set up alerts, enforce governance policies, and prevent runaway spending.
- Unmonitored resources often lead to 30–40% waste in cloud budgets (Flexera 2023 Cloud Report).
- Auto-scaling without cost caps can result in exponential charges during traffic spikes.
- Orphaned disks and unused IP addresses silently accumulate charges over time.
“The cloud is pay-as-you-go, but without visibility, it becomes pay-for-what-you-don’t-use.” — Cloud Financial Officer, Fortune 500 Tech Firm
Aligning IT Spend with Business Goals
When you can calculate Azure costs precisely, you shift from reactive billing to proactive financial management. This allows finance and IT teams to collaborate on cost-efficient architecture decisions, such as choosing between reserved instances and pay-as-you-go models.
- Cost transparency enables better ROI analysis for new projects.
- Teams can justify infrastructure investments with real data.
- Leadership gains confidence in digital transformation initiatives.
How to Calculate Azure Costs Using the Azure Pricing Calculator
The Azure Pricing Calculator is Microsoft’s official tool for estimating costs before deployment. It’s user-friendly, comprehensive, and essential for anyone planning to use Azure services.
Step-by-Step Guide to Using the Azure Pricing Calculator
To effectively calculate Azure costs using the pricing calculator, follow these steps:
- Visit the Azure Pricing Calculator: Navigate to azure.microsoft.com/pricing/calculator.
- Add Services: Search for the Azure services you plan to use—like Virtual Machines, Blob Storage, or Azure Functions.
- Configure Each Service: Specify region, instance size, usage hours, data transfer volume, and redundancy options.
- Review Total Estimated Cost: The calculator provides a monthly and yearly estimate based on your inputs.
- Save or Share Your Estimate: Export the estimate as a CSV or share via a link with stakeholders.
This tool is ideal for pre-deployment planning and comparing different architectural approaches.
Real-World Example: Estimating a Web Application
Let’s say you’re deploying a web app using:
- 2x B2s Virtual Machines (Linux) – Always On
- 50 GB Premium SSD Storage
- 100 GB Bandwidth (Outbound Data Transfer)
- Azure App Service (Standard Tier)
- 5 GB SQL Database (Standard S2)
Using the Azure Pricing Calculator, you’d input each component, select your region (e.g., East US), and adjust usage patterns. The tool might return an estimated monthly cost of $187.43. This gives you a baseline to compare against actual usage later.
Understanding Azure Cost Components to Accurately Calculate Azure Costs
To truly calculate Azure costs, you must understand the underlying pricing structure. Azure charges across multiple dimensions, and each service has its own cost drivers.
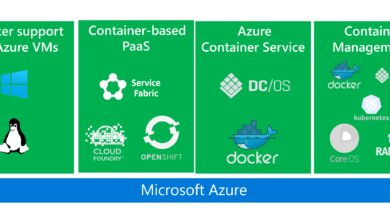
Compute Costs: VMs, Containers, and Serverless
Compute is often the largest portion of your Azure bill. Here’s how different compute models are priced:
- Virtual Machines (VMs): Billed per second (minimum 60 seconds) based on instance size, OS type, and whether it’s running or deallocated.
- Azure Kubernetes Service (AKS): Control plane is free, but worker nodes (VMs) incur standard compute charges.
- Azure Functions (Serverless): Charged per execution duration and memory used (GB-s), plus request count.
For example, a D2s v3 VM in East US costs approximately $0.132/hour when running. If left on 24/7, that’s ~$95/month. Deallocating when not in use reduces this to near zero.
Storage Costs: Blob, Disk, and Backup
Storage pricing depends on:
- Storage type (Standard vs. Premium)
- Redundancy (LRS, ZRS, GRS)
- Access tier (Hot, Cool, Archive)
- Data retrieval and transaction fees
A 1 TB Standard HDD disk in East US with LRS redundancy costs about $45.80/month. But if you move infrequently accessed data to the Archive tier, costs drop to ~$10.50/month. Misclassifying storage tiers can lead to unnecessary spending.
Networking and Data Transfer Costs
Often overlooked, networking can become a significant cost center. Key charges include:
- Outbound Data Transfer: Free inbound, but outbound data (from Azure to internet) is charged per GB. First 5 GB/month free, then ~$0.08/GB up to 10 TB.
- Bandwidth Between Regions: Cross-region data transfer costs ~$0.02/GB.
- Load Balancers and Application Gateways: Hourly rate + data processing fees.
- Public IP Addresses: Charged when not attached to a running VM (~$3.60/month).
A high-traffic media site transferring 20 TB outbound monthly could pay over $1,500 just in data transfer fees—making it critical to calculate Azure costs for networking early.
Leverage Azure Cost Management + Billing for Real-Time Insights
While the pricing calculator helps with estimates, Azure Cost Management + Billing is where you monitor actual spending. This native tool integrates with all Azure accounts and provides deep financial visibility.
Key Features of Azure Cost Management
This platform offers several powerful capabilities to help you calculate Azure costs in real time:
- Cost Analysis Dashboard: Visualize spending by service, resource group, or tag over time.
- Budgets and Alerts: Set custom thresholds and receive email or SMS notifications when limits are exceeded.
- Forecasting: Predict future spend based on historical trends.
- Export Reports: Schedule automatic CSV exports for finance teams.
- Integration with Power BI: Build custom dashboards for executive reporting.
For example, you can create a budget of $5,000/month for your production environment and get alerts at 75%, 90%, and 100% thresholds.
How to Set Up Cost Alerts in Azure
Follow these steps to proactively manage costs:
- Go to the Azure portal → Cost Management + Billing.
- Select “Budgets” under the Cost Management section.
- Click “+ Add” to create a new budget.
- Choose scope (subscription, resource group, etc.).
- Set amount, time period (monthly recommended), and alert conditions.
- Add email recipients (can include external stakeholders).
- Save the budget.
These alerts are crucial for teams without dedicated FinOps roles, ensuring no one is blindsided by a high bill.
Use Tags to Organize and Allocate Costs Effectively
One of the most underutilized yet powerful ways to calculate Azure costs is through resource tagging. Tags are key-value pairs you attach to Azure resources to classify them for billing, operations, or governance.
Best Practices for Cost-Tracking Tags
To make the most of tagging, follow these guidelines:
- Use Consistent Naming Conventions: e.g.,
Environment=Production,Department=Marketing,Project=CustomerPortal. - Enforce Tagging at Deployment: Use Azure Policy to require tags before resource creation.
- Leverage Tags in Cost Analysis: Filter reports by
ProjectorOwnerto allocate costs accurately.
For instance, if you tag all development resources with Environment=Dev, you can easily identify that your Dev environment costs $1,200/month—helping you decide whether to shut down non-critical VMs on weekends.
Automating Tag Enforcement with Azure Policy
You can prevent untagged resources from being created using built-in policies. For example:
- “Apply tag to resource groups”: Automatically applies a default tag.
- “Require a tag on resources”: Blocks deployment if specific tags (like
CostCenter) are missing. - “Inherit tag from resource group”: Ensures child resources inherit parent tags.
These policies ensure consistency and make it easier to calculate Azure costs across departments and projects.
Optimize Costs with Reserved Instances and Savings Plans
Once you’ve mastered how to calculate Azure costs, the next step is optimization. Reserved Instances (RIs) and Savings Plans offer significant discounts for committed usage.
Azure Reserved Virtual Machine Instances
By committing to use specific VM sizes for 1 or 3 years, you can save up to 72% compared to pay-as-you-go pricing.
- Available for most VM families (D, E, B, etc.).
- Can be exchanged or refunded (with limitations).
- Applies automatically to matching running VMs.
For example, a D4s v3 VM normally costs $0.33/hour. With a 1-year reservation, that drops to ~$0.18/hour—a 45% savings. Over 3 years, savings increase to ~60%.
Azure Savings Plans
Introduced as a more flexible alternative, Savings Plans offer up to 65% discount on compute usage across services like VMs, AKS, and Azure Functions.
- Commit to a fixed hourly spend (e.g., $0.50/hour) for 1 or 3 years.
- Discounts apply to any compute usage, regardless of VM size or region (within same Azure footprint).
- More flexible than RIs—ideal for dynamic workloads.
Savings Plans are especially useful if you can calculate Azure costs accurately and predict your average compute consumption.
Third-Party Tools to Enhance Azure Cost Visibility
While Azure’s native tools are robust, third-party solutions offer advanced analytics, multi-cloud support, and deeper automation.
Top Tools for Calculate Azure Costs
Here are some leading platforms that help you calculate Azure costs with greater precision:
- Azure Advisor: Free built-in tool that provides cost recommendations (e.g., “Shutdown unused VMs”).
- CloudHealth by VMware: Offers granular cost allocation, anomaly detection, and policy automation.
- Spot by NetApp: Provides rightsizing suggestions, reservation planning, and CI/CD cost tracking.
- Apptio Cloudability: Enterprise-grade FinOps platform with showback/chargeback capabilities.
- Datadog Cloud Cost Management: Integrates cost data with performance monitoring for holistic insights.
These tools often use machine learning to detect cost anomalies and recommend optimizations that Azure’s native tools might miss.
Integrating Tools with CI/CD Pipelines
Modern DevOps teams are embedding cost checks into their deployment pipelines. For example:
- Use Terraform with cost estimation modules to warn developers if a change increases projected spend.
- Integrate Spot or CloudHealth APIs into Jenkins or GitHub Actions to block deployments exceeding budget thresholds.
- Display cost impact in pull requests using tools like Infracost.
This proactive approach ensures cost awareness is baked into the development lifecycle, not an afterthought.
Common Mistakes When Trying to Calculate Azure Costs
Even experienced teams make errors when estimating or managing Azure spending. Avoid these common pitfalls:
Ignoring Egress Data Transfer Fees
Many assume data transfer is free. While inbound data is free, outbound (egress) data to the internet incurs charges. A video streaming platform serving 50 TB/month could pay over $3,000 just in egress fees. Always factor this in when you calculate Azure costs.
Overprovisioning Virtual Machines
Developers often choose larger VMs “just to be safe.” But a DS14v2 (64 GB RAM) running at 10% CPU utilization is a massive waste. Use Azure Monitor to analyze performance and rightsize to smaller instances, saving 50% or more.
Forgetting About Idle Resources
Stopped VMs still incur disk and IP address charges. “Deallocation” is required to stop compute billing. Use auto-shutdown policies or FinOps tools to automatically turn off non-production resources at night.
Advanced Strategies to Calculate Azure Costs for Enterprise Environments
For large organizations, calculating Azure costs goes beyond simple tracking—it becomes a discipline known as FinOps (Financial Operations).
Implementing a FinOps Framework
The FinOps Foundation outlines a framework with three phases:
- Inform: Gain visibility into costs using tagging, budgets, and reporting.
- Optimize: Continuously improve efficiency through rightsizing, reservations, and automation.
- Operationalize: Embed cost accountability into team workflows and culture.
Enterprises using FinOps report 20–35% cloud cost savings within the first year.
Cross-Team Collaboration for Cost Accountability
Break down silos between finance, engineering, and operations:
- Engineering teams own technical decisions but must consider cost implications.
- Finance teams provide budget frameworks and ROI expectations.
- Cloud architects design cost-efficient architectures from day one.
Regular “cloud cost review” meetings help align all stakeholders and ensure everyone knows how to calculate Azure costs accurately.
How do I calculate my Azure costs for free services?
Azure offers many free services (e.g., first 750 hours of B1S VMs, 5 GB Blob Storage). To calculate costs, use the Azure Pricing Calculator and ensure you’re aware of the free tier limits. Beyond those limits, standard pricing applies. Always check the Azure Free Account page for current offers.
Can I calculate Azure costs across multiple subscriptions?
Yes. Azure Cost Management allows you to view consolidated costs across multiple subscriptions, management groups, or even entire Azure AD tenants. This is essential for enterprises with complex billing structures.
What is the most accurate way to calculate Azure costs?
The most accurate method combines pre-deployment estimation (using the Azure Pricing Calculator) with ongoing monitoring (via Azure Cost Management). For even greater accuracy, use third-party tools like CloudHealth or integrate cost analysis into your CI/CD pipeline.
How can I reduce my Azure bill after calculating costs?
After calculating Azure costs, identify optimization opportunities: shut down unused resources, rightsize VMs, move cold data to Archive storage, purchase Reserved Instances, and enforce tagging policies. Regular audits and automated alerts will keep costs under control.
Does Azure charge for inbound data transfer?
No, Azure does not charge for inbound data transfer (data going into Azure from the internet). However, outbound data transfer (data leaving Azure) is charged, with the first 5 GB per month free. Always include outbound transfer in your cost calculations.
Learning how to calculate Azure costs is not a one-time task—it’s an ongoing discipline that combines tools, processes, and cultural change. From using the Azure Pricing Calculator to implementing enterprise-grade FinOps practices, every step you take improves financial control and operational efficiency. By leveraging native tools like Cost Management, adopting smart tagging strategies, and exploring reserved instances, you can transform your cloud spending from unpredictable to predictable. The key is to start early, monitor continuously, and optimize relentlessly. With the strategies outlined in this guide, you’re well-equipped to master your Azure costs and drive smarter business outcomes.
Further Reading: